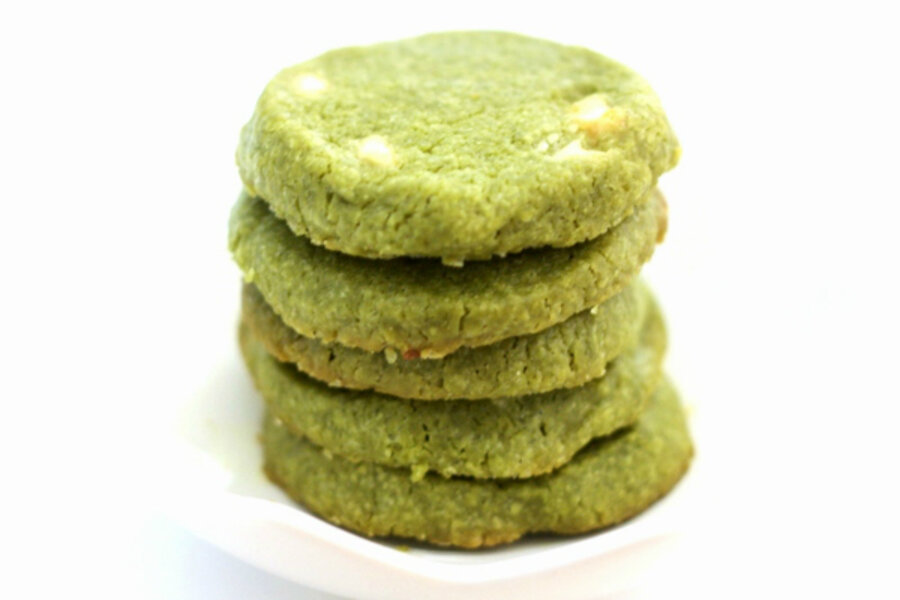
A Christmas cookie exchange and matcha green tea cookies
Loading...
When one of the moms in my son’s pre-K class invited me to her cookie exchange party, I was at a loss for two reasons:
1. I’ve never been to a cookie exchange and had to ask how it worked (how embarrassing!).
2. My family doesn’t bake cookies, at Christmas, or any time of the year.
So I did my research.
Turns out cookie exchanges can be serious business. There are rules: Bring 6 dozen cookies of one type to share (you’ll go home with the same number but with a flavor assortment). Cookies must be made from scratch and holiday themed. Plus, everyone should actually bring cookies, not caramels, not truffles, not candy.
Thankfully the hostess in question was easy-going. Caramels are fine, a dozen cookies are fine, simple cookies are fine … anything goes, she said!
Not going was out of the question because I like the group of moms at my son’s school and it would be nice to chat with them outside drop-off and pick-up. So I started thinking about what cookies to bake.
A week before the party, I settled on dark chocolate cookies with white chocolate chips. That seemed like a safe and easy choice. I’m a white chocolate fan and who doesn’t like chocolate cookies?
Two days before the party, I still hadn’t done any baking. Another mom-friend had done her baking over the past weekend and I had one of her “cookies”: saltine toffee candy sprinkled with crushed peppermint candy canes. She doesn’t have a sweet tooth but she said these were her only weakness; I can see why. They were ridiculously good.
And most importantly, they were so her.
My chocolate cookies paled in comparison.
The more I thought about it, the more my cookies didn’t seem like me. I don’t know how important that is to a Christmas cookie exchange but I wanted a cookie that everyone would go, “Ah, Pat baked these!” Christmas cookies are about sharing a little bit of yourself with friends and family, right?
I thought and thought about it and then it came to me as I was rummaging through my pantry. Matcha green tea cookies!
Then I second-guessed my choice. Would this group of moms even know what matcha was and would they try it, let alone even like it? Maybe chocolate was a better choice? I had visions of my dejected cookies being left behind after everyone had made their choices. It would be a sad, sad day if I had to bring home my own cookies from a cookie exchange.
However, the evening of the cookie exchange came along and I had nothing to worry about. My matcha cookies were cleaned out AND I won the prize for most creative cookie! Now that was a cookie exchange experience to remember.
Matcha cookies with white chocolate chips
These may not be everyone’s idea of a Christmas cookie but you could always make a red velvet version to pair with the green and you’ll have a festive theme going. For my recipe, I used Smitten Kitchen’s slice and bake cookie recipe as a base and added matcha powder and white chocolate chips to the mix. Matcha powder is available at specialty tea shops and Asian markets. Buy a good-quality Japanese matcha powder, and not green tea leaves.
Time: 30 minutes
Makes: About 4 dozen cookies
2 tablespoons matcha powder
2 cups all-purpose flour
2 sticks (8 ounces) unsalted butter, at room temperature
1 cup organic cane sugar
2 large egg yolks, at room temperature
Pinch of salt
1 teaspoon vanilla or almond extract
3/4 cup white chocolate chips
1. Sift the matcha and flour into a medium bowl and set aside.
2. Put the butter and sugar into a large mixing bowl and use a hand mixer (or a stand mixer, you lucky thing!) to beat at medium speed until well blended. Beat in the egg yolks, followed by the salt and vanilla. Reduce the mixer speed to low and add the flour/matcha mix in batches, beating until just incorporated. At this point, it’s better to underbeat than overbeat. Fold in the white chocolate chips with a rubber spatula. If the dough is still crumbly and/or there’s still errant bits of flour/matcha at the bottom of your bowl, just work everything into a smooth dough with the spatula, or your hands!
3. Have two 15-inch pieces of plastic wrap ready. Divide the dough into half and shape/roll into logs about 8- to 10-inches long and 1- to 1-1/4-inch in diameter. Wrap each log tightly in plastic wrap and refrigerate for at least 30 minutes or overnight. To prevent it from flattening at the bottom, I’ve seen suggestions from rolling it out every so often to laying it in a bed of rice. I didn’t have a problem with flattening though.
4. Position your racks to divide your oven into thirds and preheat to 350 degrees F. Line two cookie sheets with parchment paper.
5. Roll the logs on a counter a couple of times to smooth it out. You may have to let it sit for a few minutes until it becomes more malleable to reshape it. Cut into discs 1/3-inch-thick with a small sharp knife.
6. Arrange the cookies on the parchment-lined cookie sheets with about a 1/2-inch between them.
7. Bake the cookies for 12 to 14 minutes, swapping their positions halfway, until they are set but not browned. Leave them to cool on the cookie sheets for about 10 minutes (or they’ll be too soft and break apart) before transferring to a cooling rack to cool completely.


