If one African violet isn't enough, make more
Loading...
No matter what the temperature outdoors, longer and brighter days are coaxing houseplants awake indoors. Many are ripe for being multiplied now, just as they are beginning to stir.
African violet is not only one of the easiest plants to grow, it also is one of the easiest to multiply, and in so many ways.
Consider multiplying any African violet that has called the same pot home for a long time. An old plant cramped into a pot just won't flower well.
One will get you two, or more
The easiest way to make one old African violet into two or more new ones is merely to divide the stems and roots. Tip a plant out of its pot and slice right through the plant and soil with a sharp knife taking some stem with each part.
Now you have two plants. Do it again if the stem has enough branches. Plant the pieces each in their own pots with fresh potting soil, and they will soon begin to grow, then flower.
But you don't really have to be so brutal with a mother plant to make new plants. Just pulling off a leaf here and there will also do the trick.
Just a leaf is enough
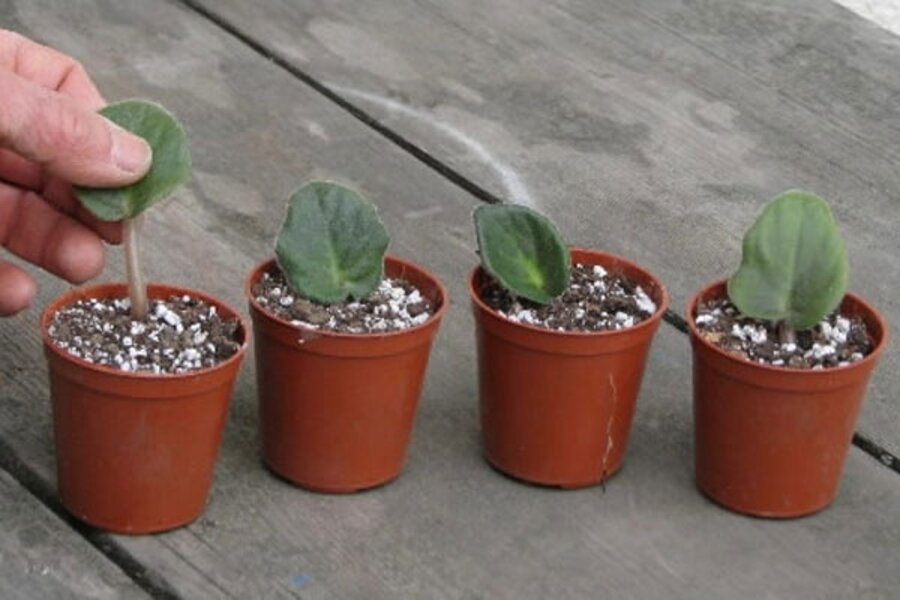
The easiest way to use an African violet leaf to make new plants is to pull off a leaf and stick its stalk into some potting soil. In a few weeks, new plants will poke up through the soil where the leaf was inserted.
Another way to use an African violet leaf for propagation is to cut off its far half, then stick its cut end down into potting soil. This time, in a few weeks, new plants will appear all along the cut edge.
Yet another way is to cut off an African violet leaf and lay it bottom side down on top of some potting soil. Once the leaf is down, use a sharp knife to make some cuts across the main veins. Then lay some pebbles on top of the leaf so its surfaces remain in contact with the soil.
A new plant should appear at each scored point.
Rooting leaves have needs
These methods share features in common besides starting out with leaves.
First of all, don't use real soil; use a "potting soil" made from equal parts perlite and peat moss.
Other materials could also be used as long as they are similarly free of weed seeds, diseases and insects, and provide an abundance of both air and moisture to the developing roots.
The air above any of these leaf cuttings must similarly be kept moist so the leaves don't shrivel up and dry out before plantlets form.
Cover the rooting leaves with clear plastic or glass to increase humidity. Lay a pane of glass above, but not against, prone leaves, or an inverted glass jar or plastic bag held aloft with dowels or twigs over prone or upright leaves.
And finally, these rooting leaves need light so they can make food for the developing plantlets. The inside of these mini-greenhouses would cook in direct sunlight, so keep them in bright but indirect light. And in a warm room.
As new plants develop, prop open the glass or plastic covering to let them bask in increasing amounts of fresh air.
Once the plants are large enough to handle, cut them away from one another and pot them up separately. Roots typically form well ahead of new leaves, so plants should take off right after potting and soon provide a colorful welcome into spring.
(Editor's note: We invite you to visit the main page of the Monitor’s gardening site , where you can find many articles, essays, and blog posts on various garden topics.)


